Welcome! This is the logbook for "Mimas" project.

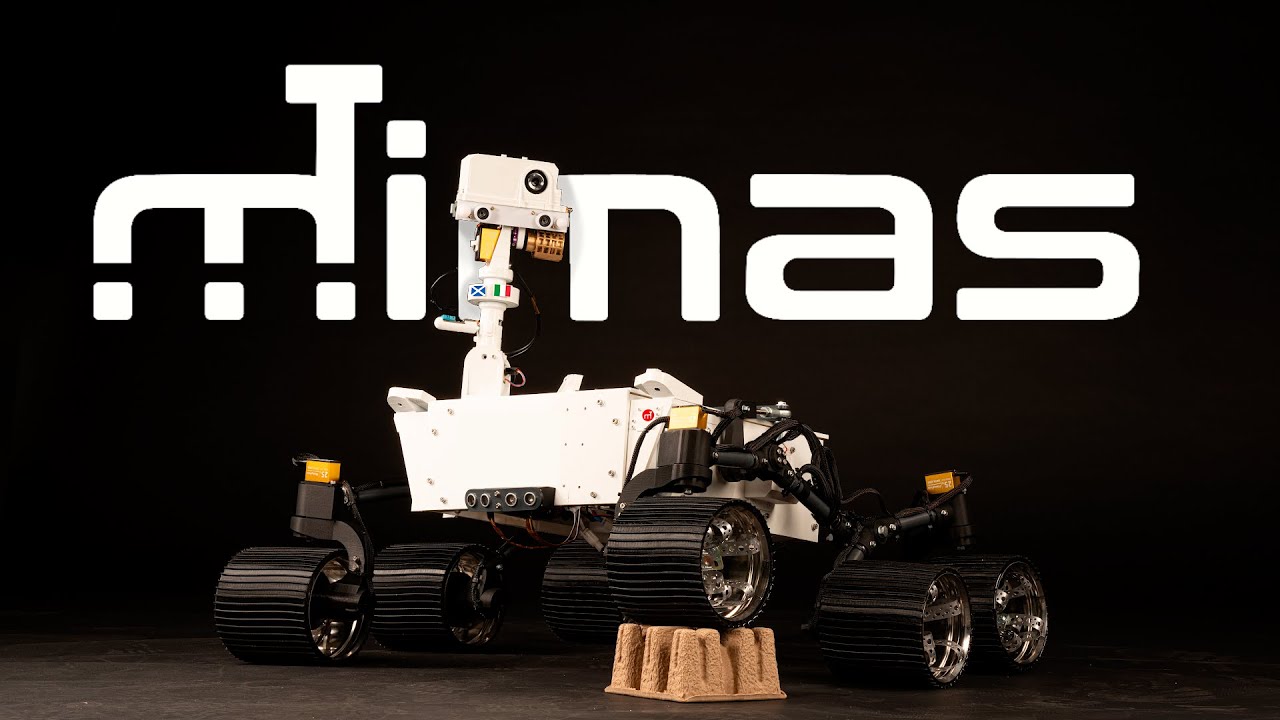
The aim of this project is to analyse, design and create a model of a Mars Rover inspired by NASA/JPL's Perseverance and Curiosity Rovers. The prototype of Mimas is realized by a fourth-year student of Mechanical Engineering at Edinburgh Napier University as part of the Honours Project. The main focus is a reliable model of a Rocker-Bogie suspension system and a terrain-aware algorithm for autonomous navigation. The rover achieves self-driving on rough terrains using several cameras and sensors. The project is entirely OpenSource.

PROJECT COMPLETION: 100%

The blog is currently under update. Python codes, Blender files and additional content will be released soon on Github.

enter image description here

Mimas on Blender!

Enjoy these two renderings of Mimas made using Blender! They are pretty accurate and show the robotic arm as well. Mimas was designed entirely using Blender, since it is a great OpenSource tool that can run on all operating systems, making it easily accessible to everyone!

  • [Hours of work: 5h]
  • [People involved: Giorgio]

enter image description here

Over the highest rock!

For its 10th driving test, Mimas was asked to drive over a 7 cm high obstacle. The rover was powered by a 10 V 1.5 A power supply and managed to overcome the "rock" quite easily. 7 cm is over the maximum safe obstacle height that Mimas should be able to face. However, this test proved that the rover can handle unpredictable situations such as AutoNav not assessing a hazard correctly.

  • [Hours of work: 2]
  • [People involved: Giorgio]

Painting cars for Mars.

Referring to the JPL design, Mimas was painted white: this paint, fortunately, does not need to withstand the harsh temperature conditions on Mars; nevertheless, the painting must be perfect. There were some areas of the chassis that must not have paint on them, so each of them was carefully masked using tape. The painting required two full days of work, with the application of several layers. The entire process took place in a custom space I set up in Merchiston Campus: 2m x 3m plastic sheets were used to isolate the painting area, and PPE was used to avoid inhaling the paint fumes. Paint layers were applied following some precise rules such as the time between duplication of each layer the thickness and orientation of the spray paint.

  • [Hours of work: 18]
  • [People involved: Giorgio, Akshit]

enter image description here

The Drive Unit, AKA the "wiring nightmare"

The Drive Unit (DU) is the key element that connects the onboard Raspberry Pi4 with all the actuators of the rover. The DU can be considered as both a hardware and software element. Speaking of hardware, the DU is composed of 4 motor drivers (L298N): each of which can control up to 2 outputs at either 5 V or 12 V DC. Motor speed can also per controlled, even if for this project, speed regulation was not used. In the Drive Unit, 1 motor driver is used to control the Remote Sensing Mast azimuth rotation (pan) actuator (stepper motor); and 3 motor drivers are used for the six rover's wheels (respectively connected as follows: LF-RF, LM-RM, LR-RR). All wires go from the interior of a small box to the exterior passing through a cable subdivision structure.

  • [Hours of work: 5]
  • [People involved: Giorgio]

enter image description here

Wheels fitting.

After a few days of casting, two wheels were ready to be attached to the respective spoke assemblies. To screw them in place, four M6 bolts are required for each wheel. Unfortunately, the process is not simple and quick, and can easily lead to small injuries due to skin scratching on metal. This is a serious problem that was not taken into consideration at the beginning of the design phase. A great improvement for the next version of the wheels might be a different and easily-accessible engage/disengage mechanism.

  • [Hours of work: 1]
  • [People involved: Giorgio]

enter image description here

Polyurethane rubber casting.

Mimas' wheels are made out of PX60 Polyurethane rubber. The pouring and moulding procedure involved mixing in a 1:1 ratio the two components of PX60, pouring the mixture between the metal structure of the wheel and the silicon mould, and waiting for 24 hours. The curing phase has been a major point of concern throughout the whole process of making the six wheels: the silicon mould and relative support structure were not made following standard and previously tested methods. This led to several errors (such as leaking and excessive material being used), which fortunately never caused unsolvable damages to the final results. In the statistics below, the "Hours of work" are considered in total, counting the wheel preparation process for six wheels.

  • [Hours of work: 9h]
  • [People involved: Giorgio, Lynn]

enter image description here

Weight balance over the wheels.

As the weight of the rover increases, the metal "U"-shaped brackets that act as an in-wheel suspension system started deforming. In the picture shown below (where the contrast has been reduce for a better understanding), on the left-hand, the rover side is tremendously leaned on the wheel and the reached angle increases stress on the 3D-printed plastic (red line). On the right-hand side of the image, however, the rover weight is more evenly distributed on the wheel (green line), resulting in an almost horizontal inclination angle if compared to the terrain (blue lines). This is achieved by doubling the "U"-shaped brackets inside the wheel. The principle of suspension embedded inside the wheel remained the same, but the maximum possible load per single wheel is significantly increased.

  • [Hours of work: 8]
  • [People involved: Giorgio]

enter image description here

Custom wire connectors.

Due to the high amount of cables that connect the motors with the motor drivers, the Raspberry Pi and the sensors, making custom wire connectors became a point of major concern. Without well-done cable management, working on the final phases of the assembly might result unreasonably difficult. Some cables have to go from the outside to the inside of the rover: to avoid dust and debris going into the WEB or interfering with the electrical connections, all cables have been shielded and custom connectors were attached, obtaining a delicate but well-functioning modular network of wire connections. The wiring process is planned to be a 2-week process.

  • [Hours of work: 3]
  • [People involved: Giorgio]

enter image description here